My 1963 Schwinn American Deluxe Rebuild - part one
Meet my 1963 Schwinn American Deluxe. I affectionately call her.. "Olga"
This is how she looked when I first got her about 5 years ago. A very cool vintage bike indeed. What really impressed me, was that everything on the bike except for the seat, tires, and headlight was original. I did have the original seat as well, it was just in desperate need of restoration. I ended up moving to Florida from Colorado and took the bike with me. It was my late Brother's bike and I had been wanting to restore it, but just didn't have the desire or motivation to do so at that point in my life.
A little over a year after the move when life started settling down for me, I decided to start tearing the bike down and cleaning it up. The bike truly is a testament as to how things were built to last back in the day. Here's some things I came across during the tear down..
Overspray everywhere!
Someone repainted this bike without actually taping anything off.
The cranks were crazy hard to remove.
I started beginning to think someone glued the nut on here.
I kid you not.. every bearing in this bike was coated with this stuff. Every moving part on this bike was stiff and sluggish, but I didn't expect that it was because of this. It looked more like silicone caulking rather than grease, and had the consistency of clay!
They eventually came clean however, and I was happy to see the bearings were still very much useable. I was even happier to see that they were the original Schwinn factory bearings.
More original hardware! A stamped AS (Arnold Schwinn) bolt,
that runs through the seat post clamp & attaches the rear rack.
This bike spent almost all of its life in California and Colorado, two very dry states. It's no surprise that the only rust I found on the frame was near the left drop out. It grinded away quite nicely, without compromising any of the welds. I will have to keep an eye on it however, with the crazy humidity levels we experience here in Florida.
The original Schwinn Steel S-7 Rims! There was a little bit of surface rust in the pits, but it came off pretty easy with a some steel wool. These rims are heavy and stout, and you could save a lot of weight on this bike just by switching to aluminum rims. Also.. you can't mount standard 26 inch tires on the S-7 rims. Surprisingly, I easily found a couple of 26 x 2 x 1 3/4 whitewalls on Amazon with no problems at all.
So here you can see the original Schwinn badge. Also, you can see the un-weathered color of the paint underneath the badge. The paint that this bike was re-shot with, was more of a maroon color.
You could just barely see the old painted white arrow pinstripes on the forks.
Remnants of an old Schwinn logo on the frames down tube
Definitely NOT original. I thought I still had the original reflector, but sadly I did not.
This looks era specific, but it's not a Schwinn reflector. It was made by 'FAIRYLITES' in the UK. Upon closer examination of the light, it jogged my memory that this reflector came off of an old english Raleigh 3-speed I owned in the 80s. It was a beautiful red 3-speed with a lugged framed.. but that's a different story.
On a side note: I still have a lot of hardware and parts from my childhood days of bike building from the late 70s to late 80s. My Dad is also a bike enthusiast, and he had them all stored in his garage for years. He gave me all of the parts at the same time he gifted me this Schwinn, that my Brother had given to him. The parts all fit in one plastic storage bin, but those parts have helped me out on past bike builds when I needed era specific hardware and parts. One of those builds was a 1970's John Deere 10 speed and a CHIMO 10 Speed Restoration I did for a friend.
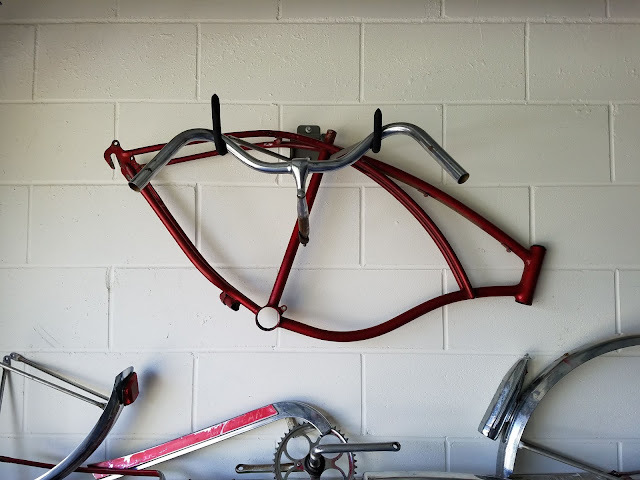
Totally disassembled, cleaned, and prepped for reassembly! I wasn't sure if I wanted to just reassemble it, repaint the frame, or do a total restoration on the old Gal. Nor would I know for a half year, as this is how long it would once again sit upon the garage wall.
The crazy thing, is that the bike almost became invisible to me after this teardown. From time to time though, it gnawed at me in the back of my mind that I needed to finish this project. I obviously had issues I still needed to work through about my Brothers death, because after I disassembled it, I couldn't bring myself to touch it again for another year or so.
But that's in the past, and she's all together once again. In my next blog post, I'll share the final stages of the build, and some more details. Stay tuned!
In case you too have been bitten by the Schwinn Bug..


Comments
Post a Comment
What do you think? I'd love to hear from you!