1970s CHIMO 10 speed retro bike rebuild
by Darrin Vindiola
Florida quite simply, is not the bicycling state that Colorado is. In fact, we ranked #2 this year for most pedestrian and bicyclist deaths! Needless to say, the biking culture here leaves something to be desired. That being said, I feel bad that since I relocated here about a year ago from Colorado, I have not been very active in the hobby. Thinking about the following retro bike rebuild however, makes me want to roll up my sleeves, start another project, and seek out new trails to explore.
During a home brewing session at my friend Mark's house a few summers ago, I noticed an old bike sitting under his deck, upside down, and covered in mud. I inquired about the bike, and he explained that it was bought by his father in the mid 70s, who absolutely rode the heck out of it. When Mark moved from Colorado to Arizona in the 90s as a young man, his dad handed the bike down to him, and Mark too put an incredible amount of miles on the bike on the streets of Phoenix.
The bike I'm referring to is pictured below. It is a mid 70s 'Chimo Special' made by Hong Kong Bicycle (HKB) which is still in business to this very day.
Mark expressed that this bike had sat under his deck for over the last two decades. He had always wanted to get the bike back into shape and give it back to his old man, but didn't know where to start, nor how to do it. I immediately told him I'd be glad to tackle the restoration, and put a couple of my own bike projects on the back burner for my buddy.
So without further ado.. here are a slew of pictures, showing exactly what I had to work with, and the majority of steps that it took to get her back into shape. Be forewarned that there are a ton of pictures accompanying this post. Enjoy..
The chain was quite rusty and unbend-able. I had a bit of struggle actually getting it off of the bike, but finally got it removed after about 5 minutes. It's deplorable state scored it a two week long bath in rust remover and lubricant, followed by a good scrubbing with a wire brush.
When I delivered this bike to Mark, he asked how I got the steel to shine once again. That question is easily answered in two parts.. patience, and a crap ton of steel wool. I polished and scrubbed until it felt as if my fingers were going to fall off. I believe you will see however, that the end results were worth it..
Mark ended up giving this bike back to his father as a birthday present, and I happened to be there when he presented the gift. His old man was ecstatic, and had no clue that the bike even still existed. Instantly, memories of past rides on his bike started flooding back to him. He couldn't believe he was once again reunited with his old bike, that had brought him so much joy and adventure over the years. I could relate to exactly how he was feeling, which made being part of this whole experience more than worthwhile.
I was amazed at how great this bike held up over the years. The majority of parts on this bike are original, and needed nothing more than cleaning, resurfacing, and lubrication. Below is a list of every item I had to replace..
Many folks see bikes in this type of condition and write them off as trash or scrap, but I'm the complete opposite. I always see them as a blank canvas, or as bikes that simply need a little.. or a lot of TLC.
There's definitely a sense of relief, pride, and satisfaction that floods over me after a bike build is complete, and it's always a bit sad to me when a project is finished. That rebuild will by no means be my last rodeo, and I'm sure it won't be long until I share results from my next retro project here on this site.
Florida quite simply, is not the bicycling state that Colorado is. In fact, we ranked #2 this year for most pedestrian and bicyclist deaths! Needless to say, the biking culture here leaves something to be desired. That being said, I feel bad that since I relocated here about a year ago from Colorado, I have not been very active in the hobby. Thinking about the following retro bike rebuild however, makes me want to roll up my sleeves, start another project, and seek out new trails to explore.
During a home brewing session at my friend Mark's house a few summers ago, I noticed an old bike sitting under his deck, upside down, and covered in mud. I inquired about the bike, and he explained that it was bought by his father in the mid 70s, who absolutely rode the heck out of it. When Mark moved from Colorado to Arizona in the 90s as a young man, his dad handed the bike down to him, and Mark too put an incredible amount of miles on the bike on the streets of Phoenix.
The bike I'm referring to is pictured below. It is a mid 70s 'Chimo Special' made by Hong Kong Bicycle (HKB) which is still in business to this very day.
Mark expressed that this bike had sat under his deck for over the last two decades. He had always wanted to get the bike back into shape and give it back to his old man, but didn't know where to start, nor how to do it. I immediately told him I'd be glad to tackle the restoration, and put a couple of my own bike projects on the back burner for my buddy.
So without further ado.. here are a slew of pictures, showing exactly what I had to work with, and the majority of steps that it took to get her back into shape. Be forewarned that there are a ton of pictures accompanying this post. Enjoy..
The first step of business was to knock the 20+ years of dirt off of it.
Mark was adamant that he wanted the decals on the bike preserved, so it would resemble its former self. It was great luck that the HKB badge sticker on the head tube was in tact, but the "CHIMO" decals on the seat tube would have to be totally redone.
The chain was quite rusty and unbend-able. I had a bit of struggle actually getting it off of the bike, but finally got it removed after about 5 minutes. It's deplorable state scored it a two week long bath in rust remover and lubricant, followed by a good scrubbing with a wire brush.
There were some serious miles put on this bicycle, and no grease at all was left on the bearings. Any grease remnants were caked onto the bearings and bearing cups.. baked with heat and friction into a hard crust. Miraculously.. the crank, headset, and wheel bearings were all sound and totally reusable after cleaning and repacking.
Shine baby shine!
BEFORE
AFTER
BEFORE
AFTER
I was able to save the pedals that were original to this bike. After an oiling and cleaning, they were both good to go, and will last for years to come.
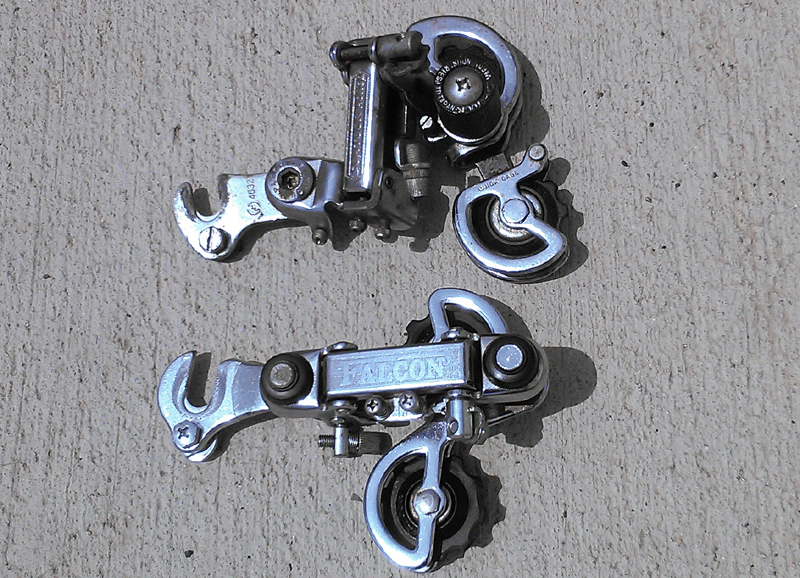
The front and rear Shimano derailleurs were totally shot, so I dug up a set of Falcon derailleurs from the same decade to swap them out with. After a thorough cleaning, oiling, and polishing, they looked good as new, and worked perfectly.
Amazing what some steel wool and elbow grease can do!
New gum-wall tires can really pull the look of a bike together, and give it a nice 70s vibe
All tore down and ready for repaint prep
This is what she looked like after a few coats of new paint. The head tube badge was in pretty good shape, so I simply taped it off before painting.
I re-lettered the down tube with the 'Chimo' name using some vinyl lettering, and wrapped the tube with some auto pin striping. It wasn't an exact match of the font type, so I cut and trimmed the letters a bit to help it better resemble the original lettering. Not an exact match mind you, but close enough to make the bike easily identifiable as an HKB Chimo. Several layers of clear coat shot over the lettering will assure it stands up for quite some time.
The finished product..
As I stood back to take a gander at the rebuilt Chimo, I was quite impressed with the overall engineering of this bike. It has a sharp looking lugged steel frame that is surprisingly light. The seat tube and head tube have fairly steep angles of around 70 degrees (give or take a few degrees).
This bike was made when lots of road racing bikes were hitting the market, which might explain why the bottom bracket that houses the cranks is a full 13 inches off of the ground. A bottom bracket that sits this high, allows you to lean the bike down around corners at an incredibly steep angle even while pedaling. I'm not so sure I've ever owned or even seen a bike with a bottom bracket this high off of the ground. It's really very impressive (to me anyway).
Mark ended up giving this bike back to his father as a birthday present, and I happened to be there when he presented the gift. His old man was ecstatic, and had no clue that the bike even still existed. Instantly, memories of past rides on his bike started flooding back to him. He couldn't believe he was once again reunited with his old bike, that had brought him so much joy and adventure over the years. I could relate to exactly how he was feeling, which made being part of this whole experience more than worthwhile.
I was amazed at how great this bike held up over the years. The majority of parts on this bike are original, and needed nothing more than cleaning, resurfacing, and lubrication. Below is a list of every item I had to replace..
Two new tires and inner tubes
era specific bicycle seat
era specific kickstand
era specific frame cable clamps
brake and derailleur cables
front and rear derailleurs
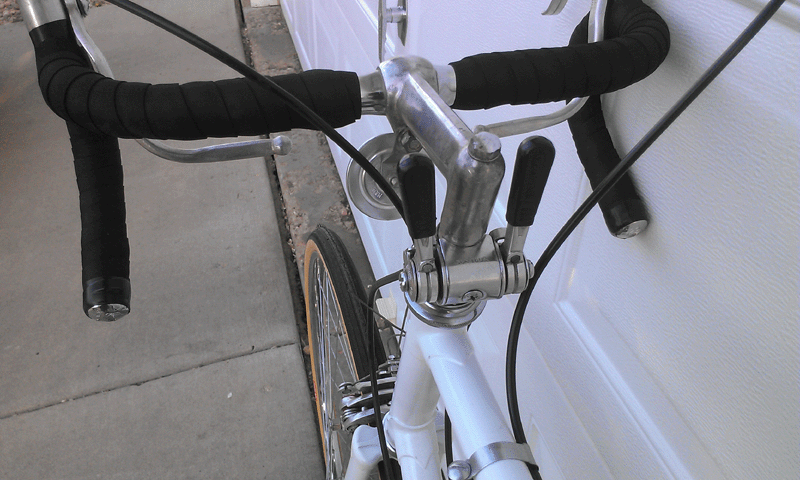
Shimano gear shift lever set
handlebar tape
a few assorted nuts and bolts
Many folks see bikes in this type of condition and write them off as trash or scrap, but I'm the complete opposite. I always see them as a blank canvas, or as bikes that simply need a little.. or a lot of TLC.
There's definitely a sense of relief, pride, and satisfaction that floods over me after a bike build is complete, and it's always a bit sad to me when a project is finished. That rebuild will by no means be my last rodeo, and I'm sure it won't be long until I share results from my next retro project here on this site.


I love old steel frame bikes from the 70s and 80s. Still call them 10 speeds. The basic transportation of my younger days.
ReplyDeleteAND.. there are still TONS of them around for projects like this one. Parts are also abundant online!!
Delete