1979 Montgomery Wards Open Road 3 speed bike rebuild
The bike was a little rough with non working brakes, shifter, rusted chain, and severely oxidized paint. However, if you could look past all of that, you'd see a bike with great bones. When I got it home, I immediately took it for a quick spin. It rode smoothly and all moving parts had tight tolerances. Thirty two years later, every part on the bike was original from the factory.
Open Road was a brand of bikes sold at Montgomery Ward department stores back in the day. They were immensely popular because they were solidly built and sold at an affordable price. Many of my friends growing up had Open Road bikes, and they all loved them.
Three speed Shimano rear hub
The three gear hub needed nothing more than cleaned and oiled. This 30 year old plus Shimano hub (and bike for that matter) was made back when things were built to last. Later in the day, I sat in front of the bike in my garage simply to admire it. The yellow paint, the orange & brown graphics and handlebar grips, just screamed 1979.
Single speed and 3-speed bikes were my life as a kid, so once I got a wrench in hand, I had the bike stripped down to the frame in under fifteen minutes.
Another clue that this bike had a pretty easy life, was the condition of the crank and fork bearings. The bearing grease on both sets of bearings was clean and translucent, with the bearings showing little to no wear.
After 1/2 hour of grinding, sanding and priming
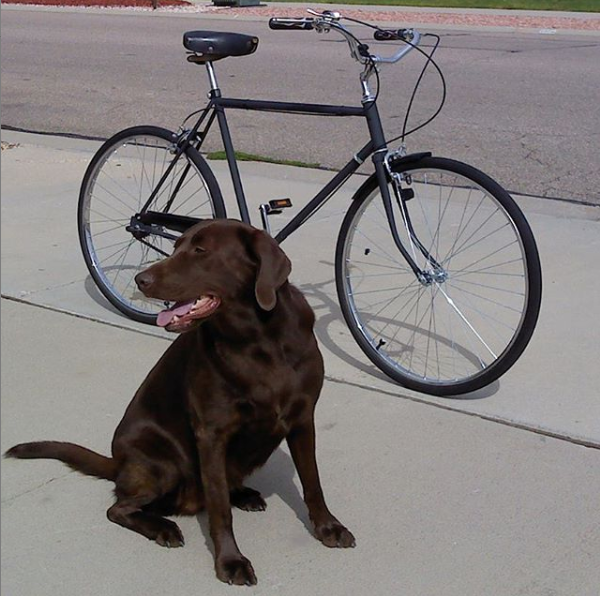
My vision for the bicycle was an unassuming road bike with a sleeper look to it, and flat black was the color I settled on. I already had a few bells and whistles in my possession to outfit her with, so the cost for this build was going to be minimal.
Sure.. it needed a little TLC to get it back to its present state, but these old bikes were built to last, and it wasn't an ordeal to get her back in tip top shape. I've bought new bikes during the last three decades, that were worth nothing more than scrap metal in under five years. There's no doubt in my mind that if properly cared for, this bike would make it another thirty years no problem.
After the bike was finished, I would load it up on the back of my car and take it to work with me a few days a week. After work, I would drive to one of the many Colorado bike trails. I would unload the bike and go for a nice leisurely ride for one or two hours.
One day at quitting time, a co-worker passing by saw the bike and came over to check it out. He said "Man.. that bike looks mean!" I said "Thanks! That's exactly what I was going for." It was quite the compliment, and I was super proud.
Mods and Flair..
One change I decided not to make was in regards to the handlebars. I had an extra set of Beach Cruiser bars, so I installed them. As soon as I did I kicked myself for doing so. The bars totally killed the feel and look I was going for. I opted to use the original bars that came with the bike, and absolutely loved the retro look. When the bike was finished, I couldn't believe I toyed with the idea of ditching them.
Another thing I left alone was the seat. The tattered, broken-in look, lent immensely to the bikes character. The style of the seat itself added to the bike's slightly aggressive look.
Big fenders look cool on bikes, but even as a kid I always thought that most were overkill. I knew this bike needed fenders to pull off the look I was shooting for, so I came up with a simple solution for modifying them.
The rear part of the fender with the brace that ran to the wheel axle is what needed to go. I took a pencil and marked off a cut point about six inches behind the fork mounting bracket. I carefully trimmed along the line with tin snips, and then sanded down the edge smooth.
After a quick sanding, priming, and three coats of gloss black paint, this was the result. While I originally wanted the bike to be entirely flat black, it just didn't look right when I started putting it back together. Therefore, I repainted the front fender and chain guard gloss black to give the bike some subtle contrast.
A new non-retro item I did add to this bike, was a low profile wireless bike computer. It was actually a gift from my old man, who is also huge bicycle enthusiast.
This little unit had a clock, odometer, speedometer, counted calories and fat burned, tracked workouts, top speed, and even displayed the temperature. It proved to be invaluable for my afternoon and weekend rides. I still have this in one of my bike part storage boxes and plan on using it again very soon.
So needless to say.. I was pretty happy with the outcome of this particular bike project. The grand total spent on the bike as you see it was $40.00. I ended up spending another $30.00 on it later on down the road for some new tires and a seat bag.
After a year of riding this bike and probably putting around 600 miles or so on it, I decided to giver her another spruce up. I found myself missing the original colors she once brandished, and decided it was time for a retro glow up. Below was the result..
Earth tones were the name of the game this time around! I repainted the frame a shade of tan, and the chain guard & seat post a light brown. I outfitted the bike with accessories that I had lying around like suede handlebar grips, a comfy brown springer seat, and a wood rear rack. The only expense incurred, was some new beautiful gum wall tires, which pulled the whole 70s retro look together.
I derive a great deal of satisfaction from bike projects like this one. If not for the issue of storage space, I would have an endless string of bike builds to keep me busy. That being said, I do have a new project I just completed that I will be posting about next week. It's a bike of my Son's that he no longer rides, that I have commandeered as my new daily rider. Stay tuned..


Killer restoration job. I found an old Allentown made Ross Eurosport that someone put out for junk. I couldn’t bear to see it go to scrap so I had to drag it home. I hope to get it road worthy one of these days.
ReplyDeleteWow. I would have saved the ROSS as well! Nice solid American bikes with lugged frames. I'd love to restore one of these!
Delete